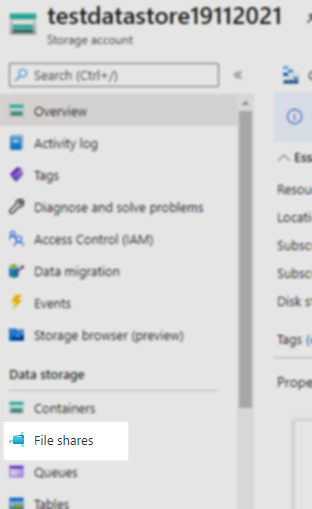
If you have created a datastore you can create a file share. Just go to your datastore resource and select File shares in the Data storage section on the left:
From this screen, you can now create a new file share. Specify a name and tier. The premium tier can only be selected if you have a premium storage account. The premium tier uses SSD disks instead of HDD disks.
Please note the maximum IO/s, egress, ingress, capacity (5 TiB):
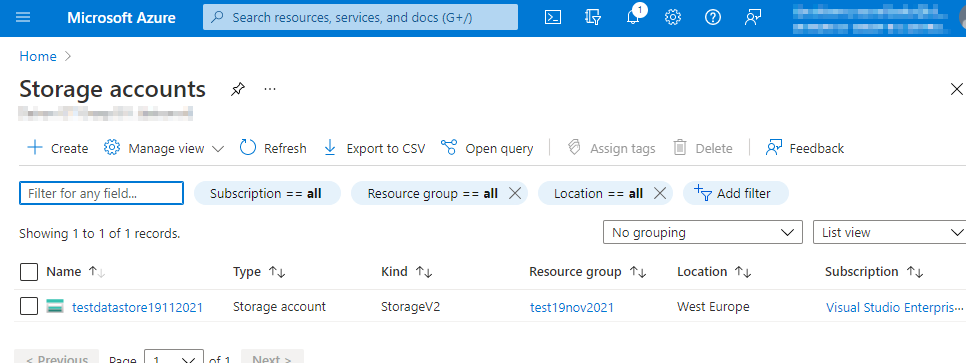
In this second post of the series I will discuss how to store documents on my local machine in Azure. First thing to do is to create an Azure storage account.
Create a storage account. This can be accomplished in the Azure portal for example. When creating a storage account you need to specify basic information like:
Create a new Azure storage account in Azure portal
So more information about the basic screen:
Subscription
Select your subscription. This can be a free, Visual Studio Enterprise or some other type of subscription.
Resource group
Select an existing or create a new resource group.
Storage account name
This must be a unique name.
Region
Choose an Azure region. Costs can vary depending on the region you select.
Performance
Standard or Premium. Standard will suffice for most scenarios.
Redundancy
Choose a replication strategy that fits your needs. The options you can choose require some theoretical information however. LRS is the lowest cost option and will suffice for now and is also recommended for non-critical scenarios.
On the advanced, networking, data protection sections a lot more options can be specified. We now leave these as is to avoid unnecessary complexity. Study these sections however so you know what’s possible or configurable. When done click ‘Create’ and the deployment will start. This will take a couple of seconds. Now you can explore your new created resource.
In this series, I will share my Azure experience and journey. Because in my opinion, it’s quite a lot of information when you are just starting. There is a lot of knowledge out there on the internet but where do you need to start and what are the first steps if you’ve purchased an Azure subscription? I first got a little bit lost in this so that’s why I decided to share my journey in order to make you help.
In this series, I will try to share my knowledge and experience to help you. My view is to discuss only a small piece or one specific feature to make things modular for better understanding and usage of knowledge. I try to explain matters from a ‘from-scratch’ view to be as clear as possible in my posts and explanation.
It’s always a good idea to first try to follow some basic training on Microsoft Learn for example. The URL is https://docs.microsoft.com/en-US/learn/ There are free excellent courses with even some labs with no costs and no Azure subscription required. These labs can be performed in the Azure portal in a sandbox to get you acquainted.
Next or if you have not studied anything yet, you need yourself to get a subscription. In my case, I got one provided by my employer. If this is not possible you can signup on portal.azure.com to start a free trial. After the trial, you can then use some Azure services for 12 months without costs but sometimes with some limitations though.
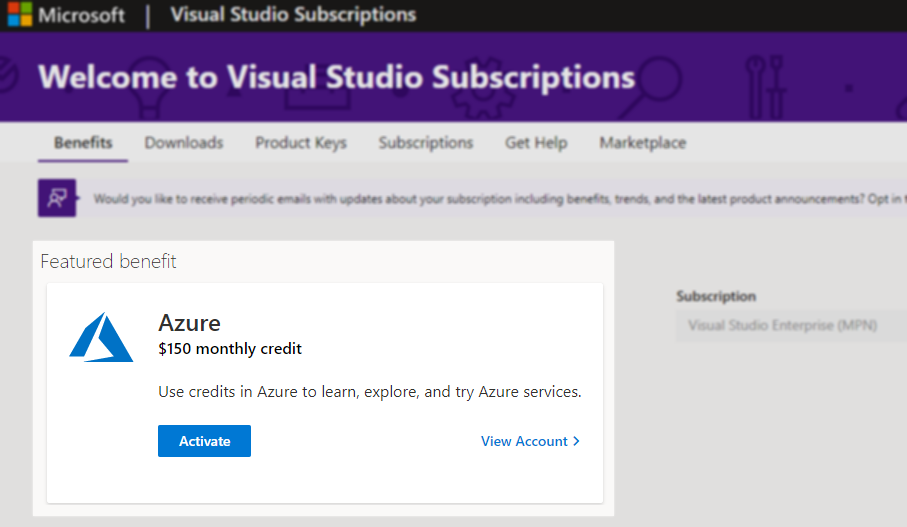
If you have a Visual Studio Enterprise subscription you can manage your monthly Azure credit and subscription by going to https://my.visualstudio.com On this website I activated my Azure monthly credit:
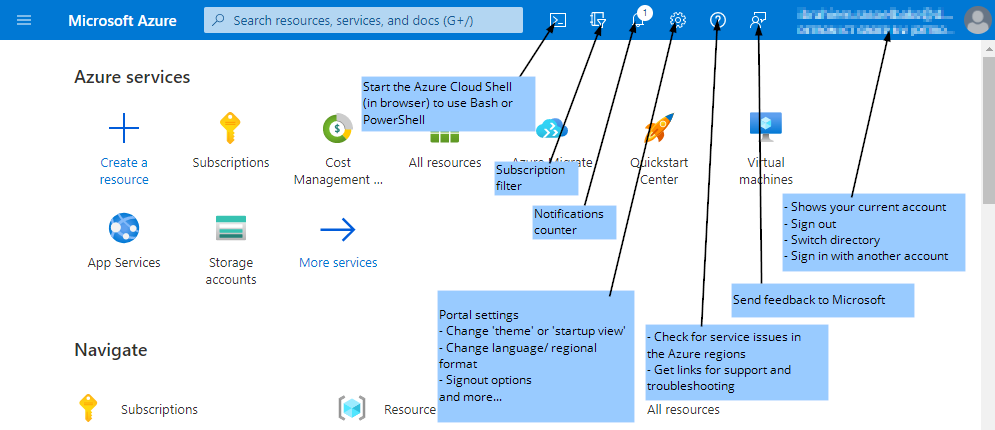
Now that I should have some ‘credit’ what to do next? Let’s go to https://portal.azure.com/ and let’s just explore what all these buttons are in the top bar:
That’s it for now. I like to keep things simple and brief. This way you also don’t need to spend hours reading extensive posts. Until the next post…. stay safe!
For on-premises environment we are responsible for all aspects of IT. For example:
Hardware
Building
Environment controls
Security
Skilled personnel
With Microsoft Azure you have options to buy these ‘aspects’ as a service. Let’s dive into the cloud possibilities:
Top down cloud deployment options:
IaaS: Infrastructure as a service. With IaaS you will be hosted by the CSP (Cloud Service Provider). This gives you the benefit the CSP is responsible for the infrastructure. You however are responsible for the OS, patching, backups etc. One example that most will understand is the usage of Azure Virtual Machines.
PaaS: Platform as a service. With this cloud deployment option you only use the services that were setup by the CSP. This means the CSP is responsible for infrastructure, OS, backups etc.
SaaS: Software as a service: it’s very likely you use this deployment option. Whether it was Gmail or Hotmail. Because this cloud deployment type offers to use the software as a service. You only use the services and only need to manage the accounts. All the rest is managed by the CSP.
BaaS: Backup as a service or sometimes also used for Blockchain as a service
DaaS: Database as a service
IaaS: Identity as a service
The differences can be displayed in a nice picture Ï found on the Microsoft website:
In this blog post I will discuss the warning that you can encounter in Visual Studio Code if you create, edit or convert pages. The warning you may get is: “Use of implicit ‘with’ will be removed in the future. Qualify with ‘Rec.’. This warning will become an error in a future release.”
If the page has quite some fields it can be quite a tedious or lenghty task to fix all these warning. There is however tooling available to let this fix for you. Just install:
AZ AL Dev Tools/AL Code Outline from the great Andrzej Zwierzchowski the final step is to go to your command palette by pressing F1 and select ‘AZ AL Dev Tools: Remove ‘with’ usage from the Active Project
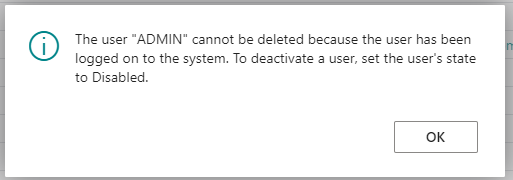
When you try to delete a user from BC you could encounter the following error:
The user “ADMIN” cannot be deleted because the user has been logged on to the system. To deactivate a user, set the user’s state to Disabled.
This message is somewhat confusing because this user is currently not logged in. To resolve the issue go to the User Personalization List (9173, List) and delete the mentioned user. Now you should be able to delete the useraccount.